Monday, March 28, 2011
Thursday, March 24, 2011
Some Photographers
Tuesday, March 22, 2011
Vintage Photo Effect
To create a vintage effect on a desired photo :
1. Photo filter adjustment layer: add yellow overlay.
Adjustment panel (right side of screen), click on the photo filter adjustment icon.
- Able to choose from a variety of different filters: choose yellow
- Change density to about 75%.
- Return to adjustment layer.
2. Add levels adjustment: want the image to look flatter and a little washed out.
- Click levels icon: drag mid-tone slider to somewhere between 1.5 and 1.6.
- Back to adjustment panel.
3. Add another adjustment layer: want to drain some of the color from the image.
- Click Hue\Saturation icon: drag saturation slider to left, anywhere between -20 and -40
4. In the layers panel: move photo filter adjustment layer to the top of the layers panel, this will keep the changes made to the mid-tones and hue\saturation layers from affecting the yellow filter.
We can make the photo look a little more vintage by adding some noise and a darkened edge effect to the image. This can be achieved by using smart filters.
1. Click on the photo layer: we are going to convert it for smart filters first.
- Move up to the filter menu: click ‘filter menu’: click ‘convert for smart filters’.
- A dialogue box will pop up, just click ‘ok’.
2.Add noise: Click the ‘filter menu’ again.
- Click noise: click ‘add noise’.
- In the dialogue box: set the noise amount to around 4% or 6% (this is subjective so choose the amount that looks good to you).
3. Add darkened edge: Click ‘filter menu’.
- Click lens correction: click ‘custom tab’.
- Drag vignette slider all the way to the left.
- Click ‘ok’.
The opacity can be adjusted by using the blending options. Suggested to soften opacity to 75%.
Sunday, March 20, 2011
Vignette in photoshop
· First you want to grab your correct style marquee.
· Next you want to drag a marquee and create the marching ants. You do want to make sure the marquee is slightly inside your image and set it where you want the vignette to begin in your photo or graphic.
· You then want to choose select on the toolbar at the top, then chose invert. This reverses the marquee.
· The second step is to right click on the marquee of the image and press feather. This brings another marquee onto the picture plane as curved shape.
· The last step is to go to Image, Adjustments, and Levels. Then take the slider toward the bottom all the way from white to black. Press enter, then command D for deselect.
· To do this for a graphic you follow the same steps, only you add a curve layer and that layer is the one you work from.
o Another way to do a vignette is to first pull up a photo, open the layers, go to curves, drag the blacks (at the bottom of the graph) over quite a ways, then drag the line down a bit (darkness doesn’t really matter. Then go to gradient and select it from dark to light, can do circular ellipse (shape of your choice), then you are just going to click in the middle of the area you want to have the “spotlight” on and drag it out. You can do it in the corner, middle, etc.
Friday, March 18, 2011
Thursday, March 17, 2011
Camera Manual on your pc
Pen Tool Tutorials
http://psd.tutsplus.com/tutorials/tools-tips/photoshops-pen-tool-the-comprehensive-guide/
http://graphicssoft.about.com/od/photoshop/l/blrbps_4abfly.htm
Happy collaging!
Tuesday, March 15, 2011
Smoke Through ( virtual women – Surreal manipulation )

http://thundafunda.com/desgins/15-surreal-photo-manipulation-gallery/
Check-out some surreal photos for the idea of next assignment
Thursday, March 10, 2011
Loading Actions, Brushes, etc. and Transfering from Earlier Version
How to Move Photoshop Actions & More to Photoshop CS5
If possible, start preparing before the program arrives via mail or prior to downloading.
- Make a list of all products that you currently use that did not come with Photoshop(for example Photoshop, actions, scripts, filters, plug-ins, brushes, patterns, styles, etc.)
- Then make a second list of the items you actually want to bring with you. On this one write down the products you want to see again. Just because you downloaded and installed something in an older version, does not mean you actually use them. Think of this as spring cleaning. You do not want to load your new Photoshopwith non-essential stuff.
- After creating the list, you may want to check with the designers and companies to see that their products are compatible with Photoshop CS5. If you use an older version, it likely will work too. The Tell a Storyboards did have to be redone when CS4 launched. So if you purchased them prior to the release of CS4, and never upgraded to it, contact me with your receipt for the CS4+ version (which also works in CS5). While certain actions could have issues, hence why you want to contact the designer, most will probably work.
- Once you have this list, you need to locate each
- item (where it lives outside of Photoshop). For Photoshop actions, as an example, you may have them saved on your desktop or in a folder already.
- On your desktop, so it is easy to locate, create a master folder that says “Photoshop Products” and then have sub folders inside for each type of product you have downloaded in the past.
- Unfortunately scripts and plug-ins have more that can conflict with upgrades. So for example, if you own, Imagenomic Portraiture or Noiseware, you may want to contact them directly and ask if your current version will work and the best way to Install. Filters do not load in, they actually have installers.
- For Scripts, you will need to manually need to move them from the folder in your older version of PS into the Photoshop CS5 folders. Just find your original instructions from the script maker or contact them, to learn how to move these over. Again, check compatibility first.
- For products like tool presets, actions and brushes, the process is easy. And the directions below apply.
- Go to the folder you created on your desktop labeled "Photoshop actions", and move over all the actions you want to keep. For those you cannot locate, or that you created and never saved, go into Photoshop and save them from the actions palette into this new folder you created.
Now what? So you have brushes, actions, tools, and more all saved into folders. Once Photoshop CS5 arrives, first install the program. Organize your workspace, and then start loading in the fun stuff. To do this, go to the drop down menu, navigate your way to where you saved everything, click on a specific action set, and then it will load. Do this for each product.

Here is a few sites with FREE downloadable actions and brushes etc.
Tripwiremagazine.com
naldgraphics.net
phototutsplus.com
Wednesday, March 9, 2011
Tuesday, March 8, 2011
How To Create Duotone Images

Here's my MASSIVE write-up/instructions on how to create a Duotone image. It's really quite easy to do.
Duotone is a generic name applied to Monotone, Duotone, Tritone, & Quadtone photos. What all of these do is allow you to choose the specific colors that you want to comprise your image. The names are indicative of how many colors are used; Monotone uses one color, Duotone uses two colors, Tritone uses three colors, & Quadtone uses four colors.
True Duotones will utilize a printing press with only the selected spot colors to create the image. Meaning, if you select Pantone 311C (an aqua color) & Pantone Black 6C, your image will use only those two premixed inks, not the typical four inks in CMYK. This could potentially save you on printing costs, if offset printing.
To start off, you want to open the image you will be working with in Photoshop. Make sure the image is flattened completely. Now, go up to Image, Mode, & select Grayscale. A prompt will come up & you will click on discard. Go back up to Image, Mode, & you will see that Duotone is now an available option. Select that. An option box appears. First thing you want to do is make sure that the Preview box is checked underneath the Cancel button on the right. Next, you will see a dropdown to the left of the word Type. Here, is where you select how many colors you want as a Monotone, Duotone, Tritone, or Quadtone. If you toggle through each one, you will see the number of inks increase below. The default color for the first ink should be Black and the subsequent inks are left blank. For this example, I will select Duotone from the dropdown.
If you’d like you can go up to the Preset dropdown and scroll through the various combinations that Photoshop has available. This can be a good starting point when experimenting with colors. I will select “cyan bl 1” for now.
You will now see the Ink 2 fill box filled with Cyan, while Ink 1 stayed the same. To the left you will notice. Much, if not all of Photoshop’s presets utilize Black as Ink 1, but you can of course change that. To change the ink color without presets, simply click on the ink color box you want to change. You can then select a different color using the Color Picker or the Color Library.
Next to each color box, you will see a curve. These curves are very similar to the curves that you typically use in your full color images, but are directly related to each color of ink. You can change the contrast and brightness or darkness of the selected ink here. You can do so by clicking & creating new points along the curve, dragging existing points, &/or typing a numeric value into the fields to the right.
Once you are satisfied with how the image looks, click OK. If you need to go back in edit the Duotone curves or colors, simply go to Image, Mode, & click on Duotone again. Change the ink colors & curves like before.
Once you are done editing & would like to keep the Duotone as a True Duotone (or edit it later), you will want to go to File, Save As, & select the appropriate format. Saving the file as a PSD is likely the safest option.
If you just want the tonal effect of a Duotone, & will be printing on a standard printer, you can change the Mode back to RGB or CMYK & save the file as a JPEG, TIFF, or any other option. **But note, that you can no longer edit the Duotone as you did before. You will need to first convert it to Grayscale again, then Duotone, & reselect all of your settings.**
Monday, March 7, 2011
Thursday, March 3, 2011
photo magazines
Tuesday, March 1, 2011
Photographer to check out - Ciro Totku

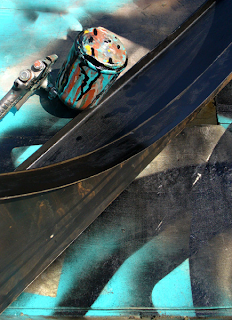
Some work that I saw in critique today reminded me a bit of the photographer Ciro Totku's work. A good portion of his work involves close-ups of objects, revealing abstract forms & interactions. He focuses on light/shadow & color planes as well. I find myself drawn to photographs along these lines & create somewhat similar works myself.
To see what other artist do with photos...http://www.artistaday.com


